Why does grout get dirty so fast when tiles stay clean? Tiles are sleek and easy to wipe down, but grout is porous and absorbs dirt over time. This can leave your floors looking stained no matter how much you scrub. If you've struggled to restore your grout to its original color, you're not alone. Many people find grout cleaning tricky.
But here is the good news for you. With the right method, it's easier than you think! Keep reading to learn how to clean the floor like never before!
Why Is Cleaning Grout a Challenge?
Grout holds tiles together, but its porous nature makes it a magnet for dirt and stains. Over time, foot traffic, spills, and moisture cause discoloration. A once-clean floor can start to look old and worn, even if the tiles are in perfect condition.
Restoring grout takes effort but is worth it. A strong cleaner and a stiff brush remove deep-set grime. Sealing grout after cleaning adds a protective layer, slowing down dirt absorption. Professionals recommend routine maintenance—gentle cleaning and sealing—to preserve the fresh look of tiled floors.
Effective Methods to Clean Grout
If your grout looks dull and stained, don't worry—you can bring it back to life! Using the right approach, you can remove dirt, eliminate discoloration, and restore the grout's fresh appearance. Here are some tried-and-tested methods to clean grout effectively.
Oxygen Bleach Powder
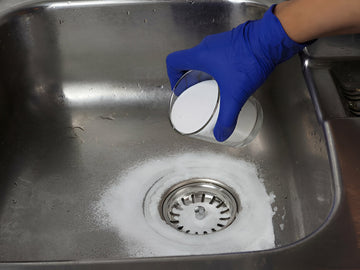
The oxygen bleach powder serves as an effective solution to combat stains and whitens tile grout joints. The powder through its germ-killing nature helps achieve both cleanliness and sanitization of your floors. The powder form of oxygen bleach provides better safety protection compared to liquid bleach when used on tile and grout. You can prepare this solution by following the package instructions to combine boiling water with the powder mixture. The oxygen bubbles function to dissolve stubborn dirt that exists deep within the grout.
Brush the entire grout surface with the prepared mixture using a toothbrush. Allow the mixture to remain on the grout for 30 minutes before wiping it off before drying occurs. The wet microfiber cloth serves to remove the mixture. For remaining dirt after cleaning you should use gentle scrubbing motions with scrubber brush on the grout. Here you go with fresh-looking grout!

Baking Soda and Peroxide Mixture
One of the fast cleaning solutions for grout is baking soda combined with hydrogen peroxide. Science Info presents that hydrogen peroxide is a natural bleaching agent that effectively combat stains. Baking soda functions as a base component while peroxide acts as a mild acid substance. This mixture produces bubbles which break loose the particles of dirt stuck inside grout lines.
The ratio for this mixture should be 2 parts baking soda to 1 part hydrogen peroxide. Use the toothbrush to spread this mixture onto the grout lines. The mixture needs to remain on the surface from one to two minutes. Use a toothbrush to scrub the grout in order to remove the dirt. Use a microfiber cloth to remove the mixture. The combination of these two ingredients creates an easy method to produce bright-looking grout without extensive cleaning.

Steam Cleaning
The high temperature steam provides an effective method to clean grout without requiring dangerous chemicals. Hot steam creates the effect of breaking loose trapped dirt from the grout lines. The method is preferred by professionals because it eliminates the need for strong manual cleaning methods. The high temperature of the steam provides both sterilization and floor sanitization.
You should connect a tiny nylon brush to your steam cleaning device before proceeding with grout cleaning. Proceed with brushing across a restricted grout region. Use a microfiber cloth to remove the soil that has become free with your initial cleaning actions. The best outcomes emerge from cleaning in small areas. You must invest in a steam cleaner for grout cleaning but this purchase will save you time and effort in the future.

Distilled Vinegar With Water
Vinegar is an excellent cleaner. Cleaning grout is easy with distilled white vinegar and water. If your grout is stained, use a baking soda paste before scrubbing. This helps lighten tough spots and makes cleaning more effective.
Before using vinegar, check if your grout is sealed. Vinegar is safe but can damage unsealed grout over time. To test, drop some water on the grout. If it darkens, it needs sealing. If it stays the same, you're ready to clean. Sealed grout is protected and will last longer with regular care.
Tip: For more comprehensive tips on maintaining different types of flooring, check out our complete floor cleaning guide.
Get Your Cleaning Tools Ready
Begin by collecting all cleaning equipment. Starting with everything prepared enables quick and effortless cleaning.
- Water: Most cleaning operations depend on water as their foundation. A bucket of water works as a base to break down dirt while it enables better scrubbing of surfaces.
- Distilled White Vinegar: Vinegar shows great effectiveness in dissolving both grime and stains. Vinegar has natural properties which make it safe to use on most surfaces. The substance combats offensive odors.
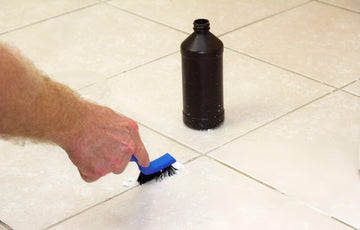
- Stiff-Bristled Brush: The tough dirt in your cleaning tasks becomes easier to remove with a tile-cleaning brush that has stiff bristles. Small areas where rags cannot access become accessible through its usage.
- Spray Container: Even application of cleaners becomes possible when using a spray container. The spray container minimizes time consumption and prevents messes while applying liquids like vinegar or water.
- Baking Soda: Baking soda serves as an effective tool to eliminate stains and eliminate odors. The tool provides excellent cleaning results in situations that require additional strength.
Step-by-Step Guide to Cleaning Tile Grout
No more scrubbing struggles! Follow our easy guide to make your grout look new in four steps.
Step One: Create a Grout Cleaning Paste
Start by mix baking soda and water to form a thick paste. You can apply this paste directly to the grout lines. Use a stiff brush or your fingers for application, but if you prefer using your hands, make sure to wear cleaning gloves. The paste will help lift dirt and stains. Let it sit on the grout for about 15 minutes. This waiting time allows the paste to work its magic.
Step Two: Prepare the Vinegar Solution
Now, take a spray bottle and fill it with equal parts water and vinegar. Shake it to mix. Spray this solution directly on top of the baking soda paste. When the vinegar hits the paste, you'll notice bubbling. This reaction is essential because it helps lift stains and dirt from the grout.
Step Three: Scrub Away the Stains
Once the fizzing settles down, it's time to scrub. Grab your scrub brush and squeegee brush and apply some elbow grease. You may need to scrub harder if the grout is particularly stained. Don't rush the process. The more thorough you are, the cleaner your grout will be.
Step Four: Rinse and Final Touches
Finally, rinse the grout with clean water. A microfibre mop works well, but make sure it only has water in it. Avoid using any soap or cleaning solutions because they can leave residue behind. This residue may stick in the grout and attract more dirt in the future. To make sure the grout is fully clean, change the water in your mop frequently. A clean rinse will give the grout a fresh look.
Tips For Maintaining Grout
Below are some proven tips to keep your grout lines free of dirt all-year round.
Prevent Dirt Build-Up with Routine Maintenance
To keep grout looking fresh, clean it regularly. Dirt and grime can build up quickly. Wipe down tiles after use, especially in high-traffic areas. This helps prevent stains from settling into the grout.
Use a Wet Vacuum for Faster and Better Results
Using a wet vacuum is a great way to speed up cleaning. It removes dirt from grout lines effectively without scrubbing for hours. Simply vacuum the area before mopping to remove larger debris. It also prevents moisture from staying too long, which can cause mold and mildew.
End with Spotless and Shiny Tiles
Once cleaned, add a final touch by polishing the tiles. Use a gentle cleaner or homemade mixture of water and vinegar to shine your tiles. This not only brightens your space but also helps prevent future dirt build-up. Regular care will keep your tiles spotless and grout looking new.
Start Cleaning Like a Pro – Get Your Grout Cleaning Tools Now!
Tired of scrubbing grout with no results? Yocada cleaning tools make grout cleaning fast and effortless! With tough bristles and a sturdy design, they remove dirt and stains in seconds. No more frustration—just sparkling clean floors! Upgrade your cleaning game today. Get your Yocada grout tools now and see the difference
Conclusion
Now that you know how to clean grout effectively, it's time to put your new skills into action. Gather your cleaning supplies, choose the right method, and start scrubbing away the grime. With consistent care, your grout will stay looking clean for longer. Take action today and enjoy the benefits of a sparkling, fresh-looking space.
FAQs
Can I restore its original color?
Yes. After deep cleaning, apply a grout colorant or stain to restore its original shade or give it a fresh look. Grout pens are also available for quick touch-ups.
Will Vinegar Damage Tiles?
Vinegar as an acidic solution will harm tiles made of natural stone including marble and granite. The stone's protective barrier will break down when exposed to vinegar which results in discoloration and surface degradation. Ceramic and porcelain tile floors tolerate vinegar use but you should apply it in moderation to reduce long-term tile damage.
How well does steam clean grout?
Steaming works as a cleaning method for grout since it removes light stains if the grout buildup is minimal. Steaming mops along with cleaning solutions work very well to eliminate unwanted substances because they do not contain chemicals. The grout suffers damage when there is too much moisture exposure unless ventilation is sufficient or humidity remains low.